Determine replacement intervals by tracking mileage, monitoring tread depth and evenness, and adjusting for load and climate. A structured schedule prevents sudden failure and manages costs.
- Record odometer readings and wear marks at every service to build a baseline.
- Match replacement intervals to actual driving patterns, not just calendar dates.
- Inspect tread, sidewalls, and pressure regularly to catch uneven wear early.
- Keep records for every tire to support fleet maintenance and compliance checks.
Start with a baseline inspection
A replacement plan fails if the starting data is wrong. Before setting an interval, inspect every passenger tire. Check tread depth using a gauge or a standard coin test. Record the reading at the front left, front right, rear left, and rear right positions. Note the odometer reading at the same time.
This baseline captures the current condition. It also reveals uneven wear that may need correction before the next rotation. If one tire is worn significantly deeper than its pair, the plan must account for that gap. Consider a vehicle with a front left tire at 4/32 inch and a front right at 6/32 inch. The two tires are not a matched pair. Running them together creates handling inconsistencies and accelerates the life of the shorter tread. In such a case, the baseline inspection triggers an immediate action: measure the remaining life of the shorter tire and adjust the replacement window accordingly. Do not simply average the four readings. The weakest point in the set determines the limit.
Define the driving profile
The same tire lasts differently on a city commute, a highway fleet run, or a mixed-use delivery route. Identify the dominant driving pattern.
- City driving: Frequent stops, low speeds, and short trips.
- Highway driving: Long distances at moderate to high speed.
- Mixed driving: A combination of urban stops and longer hauls.
City driving stresses tire shoulders and heat buildup. Highway driving wears the center tread. Mixed driving creates a complex profile. The plan must reflect the dominant pattern. Look at the daily route. If a vehicle spends most of its time in stop-and-go traffic, the outer shoulder blocks of the tread take the brunt of the load. The tread blocks at the very center see less use. Conversely, a truck or van running long highway stretches keeps the center tread blocks in constant contact with the pavement. The rubber in the center wears down faster than the shoulders.
For a mixed-use vehicle, the wear pattern can be irregular. One tire might show shoulder wear from city use and center wear from highway use. The key is to identify which mode accounts for the majority of miles. If city driving accounts for 70 percent of the vehicle’s annual miles, the plan must prioritize shoulder wear monitoring. If highway miles dominate, the center tread depth becomes the primary metric.
Set a mileage window
Most passenger tires wear within a range of 40,000 to 80,000 miles, depending on use and maintenance. Use this range as a planning window, not a guarantee.
Set a review point at 50 percent of the expected life. At that point, perform a full inspection. Measure tread depth and check for sidewall damage. If the tires are even and the tread is above the legal limit, continue. If not, adjust the replacement date.
To apply this, estimate the expected life based on the driving profile. A city commuter might expect 45,000 miles. A highway-focused vehicle might expect 70,000 miles. Set the review point at half of that number. For the city vehicle, that is 22,500 miles. For the highway vehicle, it is 35,000 miles. At these checkpoints, pull the vehicle into the bay. Do not just glance at the tires. Measure the depth at multiple points across the tread width. Check for dry rot in the sidewalls. Look for stone chips or embedded debris. If the data at the 50 percent mark shows a wear rate faster than anticipated, shorten the replacement window immediately. If the wear is slow, extend the window slightly. This dynamic adjustment keeps the plan realistic.
Implement tire rotation
Rotation keeps wear even. It moves tires to different positions on the vehicle, balancing the forces that wear each tread area.
A standard rotation pattern moves the front tires to the rear and the rear tires to the front. Some vehicles use a different pattern based on the manufacturer’s recommendation. Check the owner’s manual for the specific layout.
Rotate tires at every oil change or service interval. If the service interval is 5,000 miles, rotate at 5,000 miles. If it is 10,000 miles, rotate at 10,000 miles. Keep a log of each rotation date and odometer reading.
The rotation pattern matters. A cross-rotation moves the front left to the rear right and the front right to the rear left, then the rear tires move forward. A front-to-rear rotation keeps the same side. For vehicles with all-wheel drive or front-wheel drive, follow the manufacturer’s specific instructions. Deviating from the recommended pattern can create uneven wear, especially on all-wheel-drive systems where tire circumference differences matter.
When rotating, torque the lug nuts to specification. Use a torque wrench. Do not just hand-tighten them. Check tire pressure after rotation. Tires can lose pressure when unseated. An uneven pressure level after rotation can undo the benefits of the move.
Monitor wear indicators
Wear monitoring goes beyond tread depth. Check for:
- Tread depth: Below 2/32 inch on any tire means replacement.
- Uneven wear: One side of the tread wears faster than the other.
- Sidewall damage: Cracks, bulges, or cuts near the ground.
- Age: Rubber degrades over time, even with low mileage.
Inspect all four tires at the same time. Do not rely on a single tire to indicate the set’s condition. A mismatched set can cause handling issues or early failure.
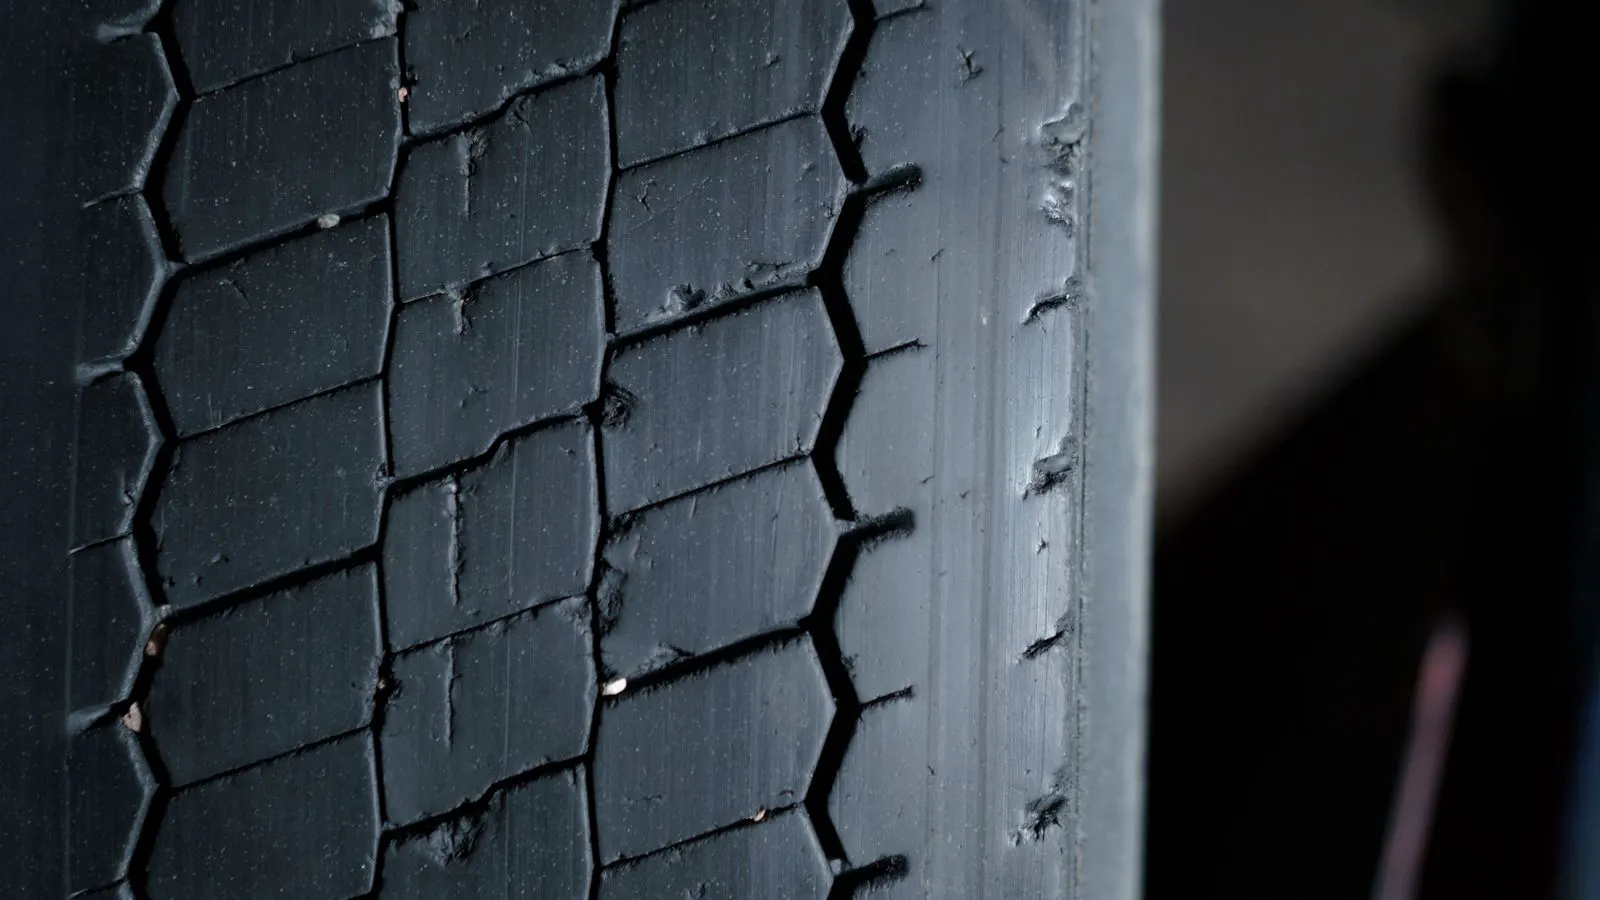
Tread depth is the most obvious indicator, but it is not the only one. Look at the tread block pattern. If the outer edge is worn down and the center is deep, the tire may be out of alignment or the pressure may be low. If the center is worn smooth and the edges are deep, the tire may be over-inflated. These patterns point to specific mechanical issues. Addressing the alignment or pressure problem prevents the next set of tires from wearing out prematurely.
Sidewall damage is often overlooked. A small cut near the ground can grow into a tear. A bulge indicates internal damage, usually from a rim strike. Do not drive on a bulged sidewall. The tire can fail without warning. Age is a hidden factor. Rubber hardens and cracks over time. A tire with plenty of tread depth can still fail if it is old. Check the date code on the sidewall. It indicates the week and year of manufacture.
Adjust for load and climate
Passenger vehicles carry different loads depending on use. A vehicle with a full passenger complement and cargo wears differently than one driven alone. Heavy loads increase heat and stress the tread.
Climate affects wear too. Hot weather accelerates rubber degradation. Cold weather makes tires stiffer and can reduce grip. Wet roads expose tread patterns and drainage channels. A tire that performs well on dry pavement may fail on wet surfaces.
If the vehicle regularly carries heavy loads or operates in extreme heat, reduce the mileage window. Set the review point earlier in the cycle.
Consider a van used for moving. It carries heavy boxes and pallets. The load on the tires is constant. The heat generated inside the tire increases. This heat breaks down the rubber structure faster. The tread depth may not drop below the legal limit quickly, but the tire’s integrity degrades. In such cases, the replacement window should be based on condition, not just mileage.
In cold climates, tires lose pressure more quickly. Cold air contracts. The tire pressure drops. This causes the shoulders to wear. In hot climates, pressure rises. The center tread wears. Monitor pressure more frequently in these extremes. A monthly check is a minimum. If the vehicle sits for a week, check pressure before driving.
Use a simple planning table
A table keeps the data organized and easy to review. Use one table per vehicle or per tire set. Update it at every service.
| Tire Position | Odometer | Tread Depth | Notes |
|---|---|---|---|
| Front Left | 12,400 | 6/32 inch | Even wear |
| Front Right | 12,400 | 5/32 inch | Slight crown wear |
| Rear Left | 12,400 | 7/32 inch | Even wear |
| Rear Right | 12,400 | 6/32 inch | Even wear |
The notes column captures observations that do not fit in numbers. Mention any unusual noise, vibration, or steering pull. This information helps diagnose alignment or suspension issues that cause uneven wear.
Keep the table simple. Do not add unnecessary columns. The four columns shown are sufficient. The odometer reading anchors the data to a specific point in the vehicle’s life. The tread depth gives the wear measurement. The notes column records the context. If the front right tire shows 5/32 inch and the note says “slight crown wear,” that is a flag. Crown wear means the center is worn faster than the edges. This is often caused by over-inflation. The next service visit must include a pressure check and an alignment inspection. Without the note, the technician might just see a number and ignore the pattern.
Common mistakes in planning
- Relying on calendar dates instead of mileage. A tire may wear out in one year of heavy use or last two years of light use.
- Ignoring rotation. Without rotation, the outside tires wear faster. The replacement date becomes unpredictable.
- Checking only one tire. The set fails when the weakest tire fails. Inspect all four.
- Skipping pressure checks. Low pressure causes shoulder wear. High pressure causes center wear. Check pressure monthly or at every service.
- Losing records. Without a log, you cannot track wear rates. The plan becomes guesswork.
These mistakes are common because they save time. A quick glance at the calendar feels efficient. But it ignores the actual wear. A vehicle driven 20,000 miles a year wears tires differently than one driven 5,000 miles a year. The calendar does not know the difference.
Ignoring rotation is a cost trap. The front tires wear faster. The rear tires wear slower. When the front tires fail, the rear tires might still have life. But you cannot mix old and new tires on the same axle. You must replace the whole set or the axle pair. Rotation extends the life of the slower-wearing tires and matches the wear across the set.
Final verification step
Before finalizing the plan, verify the data. Re-read the baseline inspection. Confirm the driving profile matches the actual use. Check the mileage window against the table. Ensure the rotation schedule aligns with the service interval.
If any element is missing, correct it before setting the date. A complete plan includes the baseline, the profile, the window, the rotation schedule, and the records. Verify that the next rotation date and inspection date are set. This step ensures the plan is actionable, not just theoretical.
A plan on paper is useless if it does not match reality. Review the table. Does the front right tire with 5/32 inch and crown wear fit the driving profile? If the vehicle is city-driven, crown wear is less common than shoulder wear. If the vehicle is highway-driven, crown wear is expected. The plan must reflect the actual wear pattern, not the ideal one. If the data shows a mismatch, investigate the cause before setting the replacement date.
When to replace early
Sometimes the plan must be cut short. Replace tires early if:
- Tread depth drops below 2/32 inch.
- A sidewall shows a bulge or deep cut.
- The tire has been in a blowout or severe impact.
- The tire age exceeds the manufacturer’s recommendation, usually 10 to 12 years from the date of manufacture.
Early replacement is costlier than planned replacement. However, it prevents breakdowns and safety risks. The plan should include a buffer for unexpected wear. If a tire shows signs of failure, replace the set or at least the axle pair.
A blowout is a clear signal. The tire has lost its structural integrity. Do not drive on it. Even if the tread looks good, the internal plies may be damaged. A severe impact, such as hitting a large pothole, can cause internal damage that does not show on the surface. The tire may fail weeks later. When in doubt, replace it.
Age is a silent killer. Rubber breaks down. It becomes hard and brittle. The tread may have 4/32 inch of depth, but the sidewall may be cracked. The tire may leak air slowly. The risk of failure increases with age. Check the date code. If the tire is older than 10 years, schedule a replacement regardless of tread depth.
Keep the plan current
Usage changes. A vehicle that was driven lightly may start carrying heavy loads. A new route may add more highway miles. The plan must adapt.
Review the plan every six months. Compare the actual tread depth against the expected wear rate. If the tire is wearing faster than planned, shorten the window. If it is wearing slowly, extend it slightly.
The goal is a predictable schedule. A predictable schedule lowers costs and reduces downtime. It also makes fleet maintenance easier to manage.
A plan is a living document. It must be updated as the vehicle’s use changes. If a delivery route adds 5,000 miles a year, the wear rate changes. The replacement window must be adjusted. If the vehicle starts carrying heavy cargo, the heat stress increases. The plan must account for that. Reviewing the plan every six months ensures it stays relevant.
Summary of the method
- Inspect and record baseline tread and odometer.
- Identify the dominant driving profile.
- Set a mileage review point.
- Rotate tires on a fixed schedule.
- Monitor wear indicators regularly.
- Adjust for load and climate.
- Use a table to track data.
- Verify the plan before execution.
- Replace early if wear exceeds limits.
- Review and update the plan every six months.
A passenger tire replacement plan is not a fixed date. It is a system of checks, records, and adjustments. The system adapts to the vehicle, the driver, and the road conditions. When the data is clear, the replacement date becomes a matter of calculation, not guesswork.
Frequently asked questions
How often should I rotate passenger tires?
Rotate tires every 5,000 to 10,000 miles or at every oil change. Check the owner's manual for the specific recommendation.
What tread depth means it is time to replace a tire?
Replace the tire when the tread depth drops below 2/32 inch. This is the general legal limit in many regions.
How do I know if my tires are wearing unevenly?
Check the tread depth at the center, inside, and outside of each tire. If the inside or outside is significantly deeper, the tires are wearing unevenly.
Do I need to replace all four tires at once?
If the tires are a set and one is worn out, replace the set. If the tires are not matched, replace the worn pair on the same axle to maintain balance.
How long do passenger tires last?
Most passenger tires last 40,000 to 80,000 miles. The actual life depends on driving conditions, load, and maintenance.